
Products Category
- FM Transmitter
- 0-50w 50w-1000w 2kw-10kw 10kw+
- TV Transmitter
- 0-50w 50-1kw 2kw-10kw
- FM Antenna
- TV Antenna
- Antenna Accessory
- Cable Connector Power Splitter Dummy Load
- RF Transistor
- Power Supply
- Audio Equipments
- DTV Front End Equipment
- Link System
- STL system Microwave Link system
- FM Radio
- Power Meter
- Other Products
- Special for Coronavirus
Products Tags
Fmuser Sites
- es.fmuser.net
- it.fmuser.net
- fr.fmuser.net
- de.fmuser.net
- af.fmuser.net ->Afrikaans
- sq.fmuser.net ->Albanian
- ar.fmuser.net ->Arabic
- hy.fmuser.net ->Armenian
- az.fmuser.net ->Azerbaijani
- eu.fmuser.net ->Basque
- be.fmuser.net ->Belarusian
- bg.fmuser.net ->Bulgarian
- ca.fmuser.net ->Catalan
- zh-CN.fmuser.net ->Chinese (Simplified)
- zh-TW.fmuser.net ->Chinese (Traditional)
- hr.fmuser.net ->Croatian
- cs.fmuser.net ->Czech
- da.fmuser.net ->Danish
- nl.fmuser.net ->Dutch
- et.fmuser.net ->Estonian
- tl.fmuser.net ->Filipino
- fi.fmuser.net ->Finnish
- fr.fmuser.net ->French
- gl.fmuser.net ->Galician
- ka.fmuser.net ->Georgian
- de.fmuser.net ->German
- el.fmuser.net ->Greek
- ht.fmuser.net ->Haitian Creole
- iw.fmuser.net ->Hebrew
- hi.fmuser.net ->Hindi
- hu.fmuser.net ->Hungarian
- is.fmuser.net ->Icelandic
- id.fmuser.net ->Indonesian
- ga.fmuser.net ->Irish
- it.fmuser.net ->Italian
- ja.fmuser.net ->Japanese
- ko.fmuser.net ->Korean
- lv.fmuser.net ->Latvian
- lt.fmuser.net ->Lithuanian
- mk.fmuser.net ->Macedonian
- ms.fmuser.net ->Malay
- mt.fmuser.net ->Maltese
- no.fmuser.net ->Norwegian
- fa.fmuser.net ->Persian
- pl.fmuser.net ->Polish
- pt.fmuser.net ->Portuguese
- ro.fmuser.net ->Romanian
- ru.fmuser.net ->Russian
- sr.fmuser.net ->Serbian
- sk.fmuser.net ->Slovak
- sl.fmuser.net ->Slovenian
- es.fmuser.net ->Spanish
- sw.fmuser.net ->Swahili
- sv.fmuser.net ->Swedish
- th.fmuser.net ->Thai
- tr.fmuser.net ->Turkish
- uk.fmuser.net ->Ukrainian
- ur.fmuser.net ->Urdu
- vi.fmuser.net ->Vietnamese
- cy.fmuser.net ->Welsh
- yi.fmuser.net ->Yiddish
FEATURE: Making a Fire-breathing Mac
Date:2020/1/9 16:43:49 Hits:
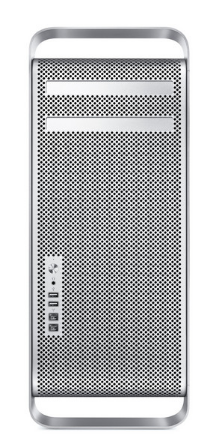
Since most of us base our studios around computers, it makes sense to ensure that the computers we use are as capable as possible. In my case, my studio has been running on a faithful first-generation dual-G5 Macintosh for a number of years. It’s reached the time when I am compelled to upgrade my studio with a new computer, so I’m moving everything over to a state-of-the-art Nehalem-based (Xeon) 8-core Mac Pro. But even with a stout computer like the new Mac Pro, it makes sense to try to wring every cycle of performance out of the machine that you can – more power is always better in the studio.
Let’s take a look at some of the things we can do to maximize computer performance. Though the items we’ll be looking at are specific to the Mac Pro, the basic concepts we’ll be discussing apply to any computer you might be using in your studio.
As far as the Mac Pro goes, it is a well-appointed machine straight from the factory. It has loads of CPU power from eight cores on two processors, dual monitor outputs, three PCIe slots (plus a double-wide graphics slot), four FireWire 800 ports, seven USB 2.0 ports (counting the two on the keyboard), stereo audio in and out (which supports analog and digital/optical signals), a headphone out, two Ethernet ports, built-in Bluetooth, optional Airport wireless, and more. But even with all that power and connectivity, there are three areas I want to expand: RAM, monitors, and internal storage.
MEMORY
The Mac Pro I’m putting into my studio came stock from the factory with 6GB of RAM installed. This is a good amount, but given the manner in which memory is managed by some applications, plug-ins, and software instruments, I wanted more. (I’m a firm believer that the most effective way to increase computer performance is to add more RAM.) For example, the operating system requires a certain amount of RAM, and plenty extra should be available for best performance. Then, an application like Logic and its plug-ins and third-party plug-ins require another chunk of RAM. And some software instruments, such as Logic’s EXS24 sampler and Native Instruments’ Kontakt sampler, also require RAM outside the host application for sample storage use – and with the size of sample libraries these days, more RAM is definitely better!
While the 6GBs of RAM that came stock, or even smaller amounts, will function well, having plenty of extra RAM will make everything operate much faster. So, the first upgrade is to take the RAM up.
Apple’s Mac Pro computers feature four RAM slots per processor, but the best performance is achieved with the first three of those slots for each processor filled. The computer came with six 1GB sticks, three per processor. For my purposes, I wanted to go to 12GB of RAM, so I replaced the six 1GB sticks with six 2GB sticks. But, since I have six unused 1GB RAM sticks lying around, I decided to move two of the 1GB sticks into the remaining two RAM slots, for a total of 14GB. This should be more than enough memory for great performance with any music/audio application, plug-in, or instrument.
GETTING INSIDE THE MACHINE
One thing that Macs have had going for them for several recent generations is that they’re exceptionally easy to get inside of and to expand. Even given that tradition, the new Mac Pro computers are works of engineering elegance; adding RAM and other expansions to them is a piece of cake! Replacing the RAM in the new (Nehalem) Mac Pros is a simple process with just a few steps:
First, with the computer plugged in but turned off, discharge any static electricity your body may have accumulated by touching the metal case of the computer. Unplug all cables connected to the computer, including the power cable. (Text continues after photos, below.)
Pull the latch on the back of the Mac to release the side panel.
Tilt the top of the side panel out, then lift the side panel off the computer.
Push the outsides of the latches at the bottom of the processor tray.
Pull the latches to release the processor tray.
Slide out the processor tray.
The computer came with 6GB of RAM installed. Three sticks in these slots, and three sticks in the slots behind the second processor (on the left). Open the ejector clips at the end of each RAM slot, and pull out the existing stick (if one is installed).
All six factory RAM sticks have been removed; all eight RAM slots are now empty.
Slide in the RAM sticks until the ejector clips snap into place. The sticks have a slot in the bottom that only allows them to be inserted in one direction, so you don't have to worry about putting them in the wrong way. NOTE: Be careful when handling RAM sticks; grasp them from the ends, and never touch the gold traces or components.
Slide in the RAM sticks until the ejector clips at the end of of the slot snap into place. The sticks have a slot in the bottom that only allows them to be inserted in one direction, so you don't have to worry about putting them in the wrong way. NOTE: Be careful when handling RAM sticks; grasp them from the ends, and never touch the gold traces or components.
Slide the processor tray back into the computer. The tray will pretty much guide itself using the pins on the bottom of the computer chassis. No pressure should be required to get the tray back in.
Close up the computer by repositioning the side panel and closing the latch on the rear of the computer.
Memory Slot Utility
Once you’re finished, and the computer is happy with your RAM configuration, choose “About this Mac” under the Apple menu and verify that all the RAM you installed is showing up.
I’ve installed a lot of RAM in a lot of computers, and this is the easiest process I’ve ever experienced.
INTERNAL STORAGE
The Mac Pro supports up to four internal SATA or SAS (Serial Attached SCSI) hard drives and up to two internal SuperDrive CD/DVD optical drives. My machine came with one internal 640GB hard drive and one SuperDrive installed. I’ll be adding three more 500GB hard drives to the machine. The 640GB drive will be the system drive and will hold the operating system and all the software. One 500GB drive will be dedicated to recording audio tracks. One will be dedicated to storing large libraries for software instruments – large virtual drums in particular. The last 500GB drive will be used for backup.
As with installing RAM in the computer, adding additional hard drives to the Mac Pro is an easy process.
With the computer plugged in but turned off, discharge any static electricity your body may have accumulated by touching the metal case of the computer. Unplug all cables connected to the computer, including the power cable. (Text continues after photos, below.)
Remove the right side panel (when facing the front) of the Mac by pulling the latch on the back, then tilting the top of the panel out and lifting the panel up and away from the computer.
Remove the right side panel (when facing the front) of the Mac by pulling the latch on the back, then tilting the top of the panel out and lifting the panel up and away from the computer.
Lift the latch (the same latch on the rear panel that locks the side panel in place) to release the hard drive carriers.
Slide out the carrier(s).
Position the carrier over the hard drive; be careful not to drag the attached screws across the circuitry on the drive.
Use the screws attached to the carrier to attach it to the hard drive. This is the only part of the process that requires a tool - a small Phillips screwdriver.
Lift the latch on the rear of the computer and slide the hard drive carrier back into the computer.
Close up the computer. When you start up the machine, the hard drives you’ve added should show up on the desktop, or the operating system should tell you that the new drives need to be initialized.
Close up the computer. When you start up the machine, the hard drives you've added should show up on the desktop, or the operating system should tell you that the new drives need to be initialized.
TAKING IT FURTHER
Need more hard drive space? You could install larger drives in the machine – new Mac Pros can use up to 2TB drives for a total of up to 8TB of storage!
Or, if you need another separate drive, there are solutions available that allow you to install one in the unused optical bay, for a total of five internal hard drives. There is even one solution that will isolate the drive from the optical bay and reduce any ambient noise it creates. (Google something like “add 5th hard drive Mac Pro” to find information.) A fifth drive will show up and be accessible to the Mac OS just as any other internal drive would. However, if you’re running Windows on your Mac, it will not be able to see the fifth hard drive.
The Mac Pro's video card features two outputs, one DVI, the other a Mini DisplayPort.
MONITORS
The Mac Pro comes with a dual-monitor video card installed. One monitor port is a dual-link DVI port, which will connect to Apple monitors or other monitors up to 30 inches in size. The second port is a Mini DisplayPort, which supports direct connection of the new Apple LED Cinema display. (A similar port is found on other newer Mac models, such as the MacBook Pro and the Mac Mini.) You can also get adapters for converting the Mini DisplayPort to VGA or DVI. I have two Acer 22-inch monitors in my studio, which connect via DVI or VGA; I’ll be using both these monitors with the Mac Pro. One connects to the DVI out, the other to the Mini DisplayPort, using an adapter.
NOW WE’RE ROCKING
With these expansions, I’ve got a computer that will tear its way through just about any task I will be throwing at it – though I’m sure there will be new software out soon that will make me want even more power! But until then, these simple upgrades have taken the computer to an entirely new level.
Leave a message
Message List
Comments Loading...


