
Products Category
- FM Transmitter
- 0-50w 50w-1000w 2kw-10kw 10kw+
- TV Transmitter
- 0-50w 50-1kw 2kw-10kw
- FM Antenna
- TV Antenna
- Antenna Accessory
- Cable Connector Power Splitter Dummy Load
- RF Transistor
- Power Supply
- Audio Equipments
- DTV Front End Equipment
- Link System
- STL system Microwave Link system
- FM Radio
- Power Meter
- Other Products
- Special for Coronavirus
Products Tags
Fmuser Sites
- es.fmuser.net
- it.fmuser.net
- fr.fmuser.net
- de.fmuser.net
- af.fmuser.net ->Afrikaans
- sq.fmuser.net ->Albanian
- ar.fmuser.net ->Arabic
- hy.fmuser.net ->Armenian
- az.fmuser.net ->Azerbaijani
- eu.fmuser.net ->Basque
- be.fmuser.net ->Belarusian
- bg.fmuser.net ->Bulgarian
- ca.fmuser.net ->Catalan
- zh-CN.fmuser.net ->Chinese (Simplified)
- zh-TW.fmuser.net ->Chinese (Traditional)
- hr.fmuser.net ->Croatian
- cs.fmuser.net ->Czech
- da.fmuser.net ->Danish
- nl.fmuser.net ->Dutch
- et.fmuser.net ->Estonian
- tl.fmuser.net ->Filipino
- fi.fmuser.net ->Finnish
- fr.fmuser.net ->French
- gl.fmuser.net ->Galician
- ka.fmuser.net ->Georgian
- de.fmuser.net ->German
- el.fmuser.net ->Greek
- ht.fmuser.net ->Haitian Creole
- iw.fmuser.net ->Hebrew
- hi.fmuser.net ->Hindi
- hu.fmuser.net ->Hungarian
- is.fmuser.net ->Icelandic
- id.fmuser.net ->Indonesian
- ga.fmuser.net ->Irish
- it.fmuser.net ->Italian
- ja.fmuser.net ->Japanese
- ko.fmuser.net ->Korean
- lv.fmuser.net ->Latvian
- lt.fmuser.net ->Lithuanian
- mk.fmuser.net ->Macedonian
- ms.fmuser.net ->Malay
- mt.fmuser.net ->Maltese
- no.fmuser.net ->Norwegian
- fa.fmuser.net ->Persian
- pl.fmuser.net ->Polish
- pt.fmuser.net ->Portuguese
- ro.fmuser.net ->Romanian
- ru.fmuser.net ->Russian
- sr.fmuser.net ->Serbian
- sk.fmuser.net ->Slovak
- sl.fmuser.net ->Slovenian
- es.fmuser.net ->Spanish
- sw.fmuser.net ->Swahili
- sv.fmuser.net ->Swedish
- th.fmuser.net ->Thai
- tr.fmuser.net ->Turkish
- uk.fmuser.net ->Ukrainian
- ur.fmuser.net ->Urdu
- vi.fmuser.net ->Vietnamese
- cy.fmuser.net ->Welsh
- yi.fmuser.net ->Yiddish
How to Install Coaxial Cable
Date:2018/12/4 19:24:33 Hits:
Cutting the cable and attaching connectors is much easier than one would think. You just need the right tool. Simply pick up a coaxial tool and some male connectors as seen in the picture below.
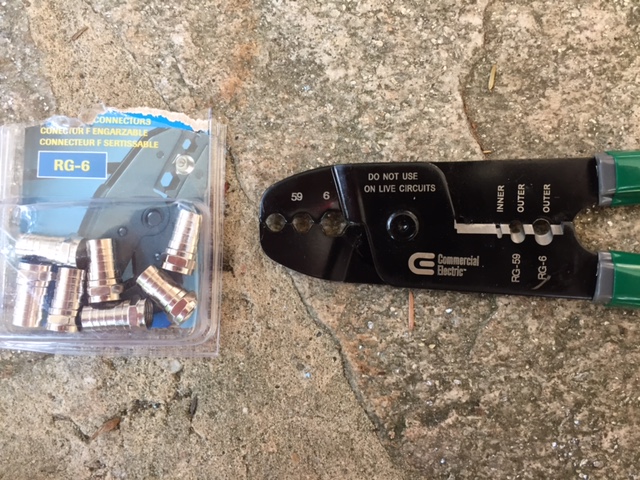
Be sure to check the type of cable you are using. In the U.S. most cable and antenna installations are done with either RG-59 or RG-6. You should be able to find it printed on the cable. If you are purchasing cable to do the install, get the RG-6. It’s a less noisy cable, which translates into receiving more TV channels.
To install the coaxial connectors, just follow the following steps.
1. Cut the cable (literally this time).
Figure out where you want to install the connections and cut the cable. I like to leave about 6 inches of “mistake room” on each side. Your coaxial tool should have a cable cutter to cut the cable.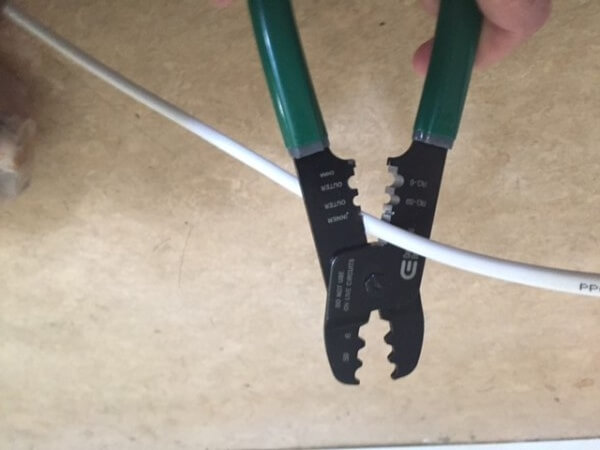
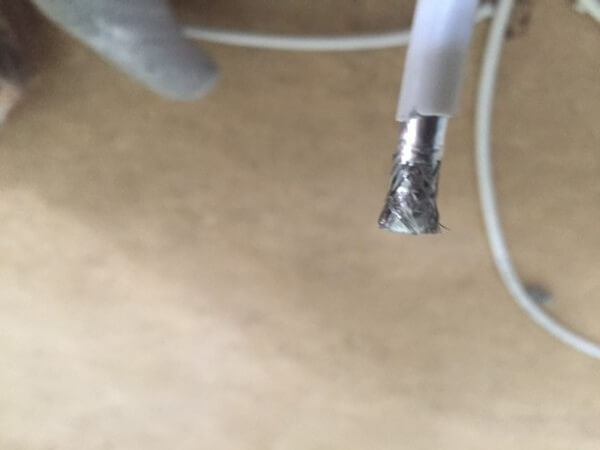
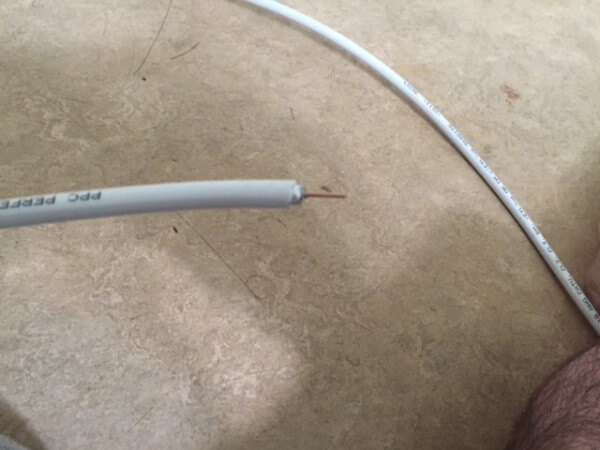
Below is a photo of the inside of the coaxial cable. It’s hard to see in the photo, but there is a tiny copper wire in the center with a foil shielding around it. Around the foil is the white (can be other colors as well) cable sheath.
2. Remove Outer Cable Sheath
On your coaxial tool there should be an outer cable stripper. Be mindful of the size of the cable you are working with. As you can see, I’m working with RG-6. Tightly clamp the cable stripper around the cable and rotate the tool completely around the cable.After one or two rotations, pull the piece you just cut from the cable. If you have trouble, you may need to do another rotation. When the outer sheath is removed, you should see the inner foil shielding around the inner copper wire. It should see something like this. . .
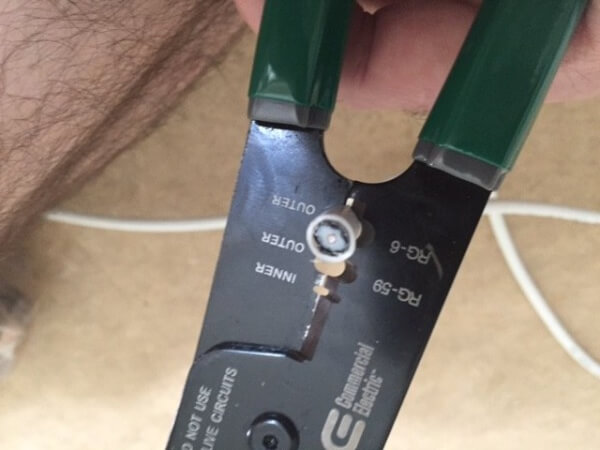
3. Remove Foil Shielding
Line up the inner wire stripper with the copper wire in the middle of the foil shielding and slowly clamp the tool around the inner copper wire. Ensure that the copper wire ends up in the wire stripper when you close the tool. Otherwise, you will cut the copper wire along with the shield, forcing you to start over.

Just like when you removed the outer sheath, rotate the tool and remove the foil shielding. You should now have a coaxial cable that looks like this.
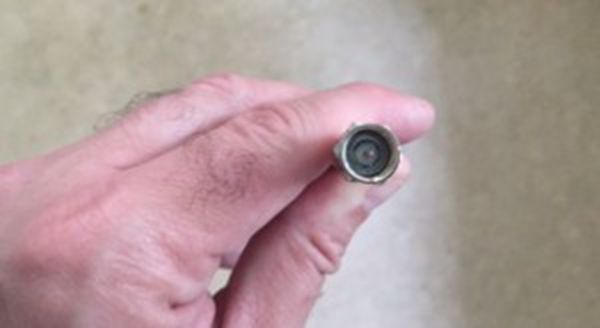
4. Install the connector
This part can be a struggle sometimes. Push the connector onto the end of the cable. You goal is to have the inner copper wire come through the connector. When looking into the connector the inner foil shield should be flush with the base of the connector. Here is a photo of what it should look like.
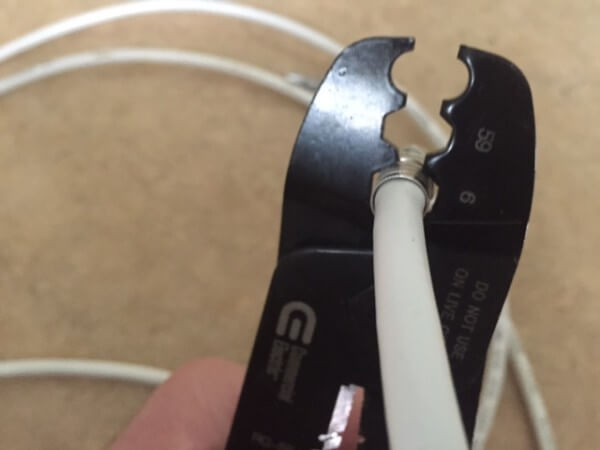
Crimp the connector onto the cable as tight as you can so it down’t come off. If you are installing this outside, I recommend using compression fittings.
You’re all done. Now you can buy a spool of coax and impress your friends and family, or possibly throw a crimping party.
Maybe you will know:
How to Replace a Coaxial Cable Connector
Coaxial Feeder / RF Coax Cable Tutorial
30meter RG-178 B/U RF coaxial cable for FM transmitter use
Leave a message
Message List
Comments Loading...
